
No-Show Fees

When a Client Disputes a No-Show Fee: How Appointment Businesses Win the Chargeback

A client misses an appointment, is charged a no-show fee, and then disputes it with the bank: “I never agreed to this charge.”

Chargebacks are an unavoidable part of running a business. They occur when a client disputes a charge with their bank and the bank determines whether that charge is valid. For salons, spas, tutors, consultants, clinics, fitness, and other appointment-based businesses, no-show fees can help reimburse the time that was reserved but never used. The real question is whether you can show that the client was aware of the fee, consented to the policy, and was billed in accordance with these terms.

That is why the evidence that is collected before the appointment could be equally valuable as what happened on the day of the no-show. Booking records, policy terms, consent records, timestamp, reminder messages, cancellation details, and others could explain why the charge was incurred.

Why Do Clients Dispute No-Show Fees?

Why Do Clients Dispute No-Show Fees

A no-show fee is a bit different from a regular payment. With a regular payment, the client knows they have received something in return, but with a no-show, they may not have received the actual service or product. The client may perceive they received nothing, so they should not be charged.

This is why a business needs a more explicit record of what was promised and what the client agreed to, rather than a general statement that a cancellation policy is in place.

The Terms Should Be Clear Before Booking

The best way to prevent no-show fee chargebacks is to set all the rules in advance. This means your cancellation policy should clearly state the rules and conditions for appointment cancellations or changes, which clients will consider when they want to reschedule. Also specify the acceptable cancellation period and the amount of the late cancellation or no show fee. If you plan to charge the client’s card on file, you must also state this in the rules.

Do not bury the policy in a set of terms and conditions. Display it during the booking process so that the client sees it and agrees to it. A transparent policy helps you build a strong case if a dispute arises over the amount charged.

Capture Consent When Booking

A cancellation policy that clients must follow is essential, but the booking system should provide evidence that the client viewed the policy and consented to it. This can be done with a checkbox during booking, where the client must consent to cancellation and no-show terms.

A checkbox during booking can be beneficial. It should state the rules concerning cancellations and no-shows. The booking system must also note the time when the client accepted the policy. The critical element is not a checkbox, but the ability to demonstrate that the client consented to the specified terms and when they gave that consent.

If your booking system records consent and timestamps, keep those records available in case the payment is later disputed.

Keep the Booking Record

The booking record can be very useful if a client later disputes a no-show fee. Store information such as the appointment date and time, booked service, client data, the cancellation policy shown during the booking process, and the client’s approval of the cancellation policy. This data helps clarify what was provided to the client in case of a disagreement over fees. If the customer insists they were unaware of the charges, the records will show the information the business provided at booking.

It may also be a good idea to save a screenshot or copy of the booking page in case you change your refund terms later. The most important thing is to have a record of what the client booked, what they agreed to, and when the fee was charged.

Reminders Can Help Prove What Happened

Appointment reminders do more than remind clients of an upcoming visit; they can also help if a client refuses to pay for a no-show. A reminder serves as proof that the business attempted to contact the client and notify them of their appointment. The reminder may also include details about the cancellation policy or a link for the client to review it.

Log every reminder you send, with its date and whether it was delivered. This supports the case that the client knew about the appointment and the policy, although it is not enough on its own.

Check the Cancellation Window

Check the Cancellation Window

Before responding to a dispute, make sure that you have checked all dates and times carefully. If your policy requires a client to cancel minimum 24 hours before an appointment, you must be able to show when the booking was made, whether and when the client canceled, and when the appointment was scheduled to take place.

This ensures the no-show fee was charged correctly under your policy. Do not answer the dispute reflexively just because the client was absent. Check whether the amount paid matches what the client agreed to. If you took a bigger fee than the policy stated, the case will be hard to win.

What Evidence Should You Collect?

When a client disputes a no-show fee, gather all relevant records before replying. First, include the booking details, such as the appointment date and time, the service booked, and the client’s information.

Also, retrieve the cancellation/no-show policy in force at the time of booking. If applicable, attach the document that confirms the client’s acknowledgment of the policy (e.g., booking confirmation with a checkbox). Finally, collect the consent record (e.g., checkbox) and its recording date/time.

Ensure all appointment reminder messages and communications between the business and the client relate to the appointment. Finally, provide payment details stating the amount the client was charged and explain how the amount was determined under their policy.

This information clarifies the situation: the client scheduled an appointment, consented to the cancellation policy, received appointment information, failed to cancel before the deadline, and was charged accordingly.

Build a Clear Representment Package

When a client initiates a dispute, the payment provider usually lets your business respond with why the money should not be charged back. This process is known as representment, and the payment provider may have specific instructions and deadlines. Review the instructions from your processor and follow the steps in the dispute notice they sent.

To ensure you provide the correct information, respond in one message with the following: a brief description of the situation; the booking confirmation; the cancellation policy; the consent record; the appointment reminder; the cancellation information; and payment details.

Dates matter because they reflect the chronological sequence of events. Therefore, the response should be based on factual information, exclude emotional language or allegations that the client lied, and restate the terms under which the no-show fee was charged.

A Signed Policy Is Not the Whole Story

A signed policy or online acceptance helps, but it is not enough to cover the no-show fee. The terms should be straightforward, clearly state the fees, and match the amount charged to the client. In addition, the amount should align with what the client agreed to at booking.

For instance, a client may have agreed to a general cancellation policy. If the business charges a specific amount for a no-show, the policy the client accepted must state that amount. Provide the full policy text the client agreed to, with the relevant terms highlighted.

Think of your evidence as a chain of evidence. The booking record shows the appointment; the policy shows the fee; the consent record shows the client consented; reminders show you reminded them; the cancellation record shows what happened; and the payment record shows what you were paid. Altogether, it offers a complete view of the situation.

When Should You Refund Instead of Fighting?

When Should You Refund Instead of Fighting

Not every dispute needs to become a battle. Sometimes, it might be worth not fighting the no-show fee chargeback. If the amount is small, the time and effort of fighting it can cost more than the fee. The same goes for situations where the company lacks relevant information, or the client had a valid reason for missing the appointment.

If a new client missed an appointment because of an emergency, it may be fair to refund them as an exception. That does not mean refunding every disputed fee. Thus, before taking any action, review the available evidence, including amounts paid, the client’s personal information, the reason for the objection, expenses, and time spent on the matter. If the information shows the charges were made in error, it would be fair to return the payments.

Use Clear Policy Wording

A confusing cancellation policy may lead to misunderstandings and damage the business’s reputation, so write it clearly and precisely. The policy must state the conditions under which a client may cancel an appointment without being charged. It should also define what constitutes a no-show, explain what will be applied in that case, and describe how the business will collect payment.

If you charge a credit card for cancellations or no-shows, you must make that information transparent and easy to understand. It should also explain that you’ll charge the card if the client misses the appointment or cancels too late.

Make sure the information is consistent across all platforms. Otherwise, the client may see different data on your website and in the booking confirmation, which will lead to a dispute over the no-show fee.

Keep Your Records Organized

A dispute can be hard to resolve if you can’t quickly retrieve appointment records. Keep records of bookings, consents, reminders, cancellations, and payments so your staff can quickly find the information they need.

If your booking system can save this data automatically, ensure that your team knows how to access it. Cloud Booking Manager, for example, can help you build a booking workflow that automatically stores customer consent and the booking date and time. Essential information needed for a dispute includes the booking confirmation, the policy the client agreed to, and the amount they were charged.

Good record keeping is useful for more than chargebacks. It also helps staff answer client questions and quickly understand what happens when a booking is canceled or missed.

Make the Cancellation Policy Easy to Follow

The right approach to prevent disputes over no-show fees is to establish a cancellation policy that’s easy to understand. State the rules for canceling or rescheduling, and remind clients of the consequences of missing the appointment.

The cancellation policy should also make canceling or rescheduling an appointment as easy as possible.

For that reason, offer clients an online portal so they can do it themselves instead of calling. Nobody wants to call three times to reach someone when they could do it themselves in seconds. That is why your appointment reminder should also include cancellation and rescheduling information.

Conclusion

A no-show fee chargeback is easier to handle when the business keeps accurate documentation of the events leading up to it. Start with the appointment schedule, including a clear no-show and cancellation  policy and the customer’s approval. Store event data, send reminders, and keep cancellation documents. Most importantly, make sure the amount charged to the customer is reasonable and matches the rules established at the start.

If the client disputes the fee, the documentation described above will help the business prove the charge’s validity. Respond to the dispute precisely, to the point, and in line with the payment service’s guidelines. Meet the service’s deadline and avoid unnecessary information.

A company does not always have to reject the dispute and provide evidence for the no-show fee. Sometimes, it’s better to issue a refund and satisfy the client than to risk losing money on a dispute.

FAQs

  1. Can a client charge back a no-show fee?

    Yes. A client can dispute the charge with their bank even if the business believes the fee was valid.

  2. What evidence wins a no-show fee dispute?

    Clear booking records, policy acceptance, appointment reminders, cancellation details, and proof that the fee matched the agreed terms can support the dispute response.

  3. Should you refund a first-time no-show?

    It depends on the situation. A business can waive the fee as a one-time exception.
Deductible Reset

When Deductibles Reset: Preparing the Front Desk for Patient-Pay Season

January can turn a medical practice’s entire revenue cycle on its head overnight. One moment, a patient pays a small balance for a December visit; the next, they’re asked to pay much more for the same service because their health plan’s deductible reset.

This can leave front-desk teams dealing with more patient queries, higher balances, and difficult payment discussions, making deductible-reset collections a Q4 planning item, not just a January problem.

A simple preparation plan for Q4 can make the transition easier at the beginning of the year. The staff can take the time to recheck the insurance benefits, go over patient balances, prepare estimates, confirm that patients have given permission to keep cards on file, and go over the necessary information regarding payment plans. This way, when January rolls in, a simple course of action will be available for the front desk instead of a complicated one.

What Happens When a Deductible Resets?

What Happens When a Deductible Resets

A deductible is the amount a patient must pay out of pocket for covered services before the plan begins paying its share. The deductible applies once the plan year begins.

Therefore, for most patients, this is an amount they are required to meet before the plan pays. For instance, a patient who has met a large deductible by December would have to pay higher amounts when seeking similar services in January because their insurance plan renews the deductible every year.

The amount your patient pays for services depends on their plan, what’s left to pay as deductible, copay, and coinsurance, and what service they’re receiving. So, the front desk can’t assume that what the patient paid in December will be the same in January. This is why January deductible season can create a noticeable increase in patient-pay activity.

Why Q4 Preparation Matters

The last few months of this year are a great time to start preparing for next year’s deductible cycle. Waiting until the first week in January to make any changes leaves your front office staff scrambling to handle both insurance issues and patient balances at the same time.

Review your usual insurance benefits verification and estimated patient payment procedures. Make certain everyone knows what information to gather and where to document it.

It is also a good idea to review your practice’s payment policies before the new year. If your practice offers payment plans to patients, your staff should be familiar with the plans and be able to describe them to patients.

Re-Verify Benefits Before the New Year

Insurance information changes from year to year. Your patients could have a new card, a different deductible, a new employer plan, or changes in coverage. The front desk can no longer rely on last year’s information.

As you approach the new year, take some time to review your verification process and look for patients with upcoming appointments. When possible, verify their current coverage and confirm the details that will affect what they are responsible for.

This may include their deductible, copay, coinsurance, and other patient responsibility information.

The purpose is to avoid misrepresenting the patient’s final bill. The actual bill could be higher or lower than what is estimated, so present the figure as an estimate based on the information available to you prior to the visit.

Clear communication is especially important during the first few weeks of the year when many patients are experiencing the reset at the same time.

Prepare the Front Desk for More Payment Questions

Prepare the Front Desk for More Payment Questions

January brings more queries about billing statements and questions about why a patient owes money. Staff should be prepared to describe the difference between a copay, deductible, and coinsurance to patients in understandable language.

In addition, an employee should know when to advise a patient to contact the insurance company and what to tell them. The front desk can inform the patient of what the office is requesting based on the available information, but the insurer is the one who knows the details about a person’s plan benefits.

A consistent response should be used to address a patient’s concerns.

For example, staff members could tell people that their plan has a deductible and remind them of the information the office used when sending the bill. If a patient indicates that the information is wrong, the staff member can explain that the office will contact the insurer to clarify the benefits, and explain how the patient can do the same.

The conversation does not need to become complicated. The key is to give patients clear information without making promises about a claim the practice cannot control.

Review Card-on-File Permissions

If your practice uses cards on file, Q4 is also a good time to review the process.

Make sure the practice has the required patient authorization before charging a stored payment method. Patients should clearly understand what they agreed to and how their card may be used.

A deductible reset can result in higher patient balances. Therefore, old card-on-file arrangements should not automatically be treated as permission for every type of charge. Review your practice policies and any applicable requirements before processing payments.

Staff should also have a procedure for when a stored card is denied or declined. By providing staff with a procedure, you can ensure they act consistently. The whole point is to make collecting payments as simple for the patient, and as reliable for the practice, as possible.

Have a Payment Plan Conversation Ready

Not every patient can pay a larger balance in one payment. Patient payment plans give the practice another option.
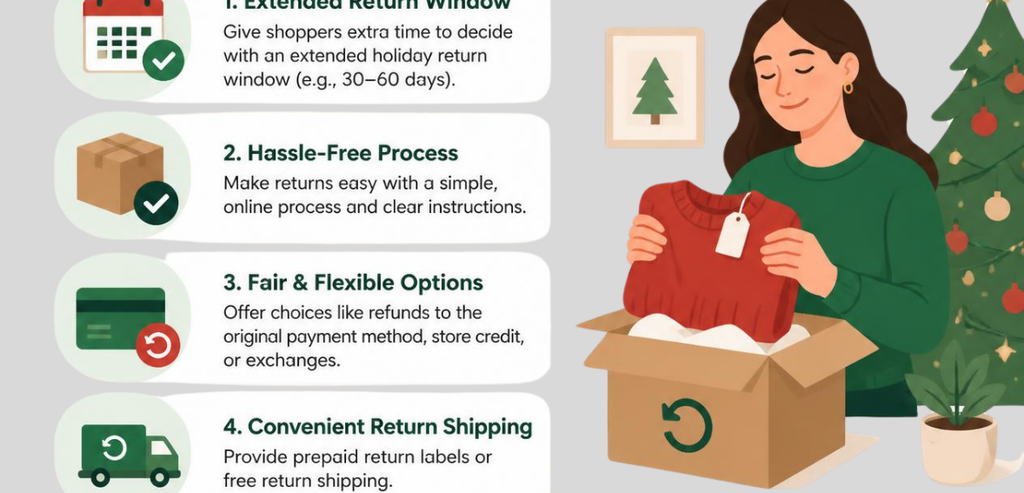
If your practice offers payment plans, make sure front-desk staff understand who may qualify, how payments are scheduled, and what information patients need to enroll.

Staff should not make promises that go beyond the practice’s payment policy. Instead, they can explain the available options and help patients understand what to do next.

For example, staff members could say,

“Based on your insurance information, it appears that you have a higher patient balance this year. If paying the entire amount due today is difficult for you, we can go over the payment options that are available through our practice.”

The script doesn’t have to be worded this way. It just needs to be worded in a way that seems comfortable to the staff member saying it.

Watch the Time-of-Service Collection Rate

January gives practices a useful number to watch: the time-of-service collection rate.

This indicates the percentage of estimated patient responsibility collected at or near the time of service. This measure can help the practice assess how effective its front-desk revenue cycle is. 

If the rate drops significantly in January, investigate factors contributing to the change. Verify that benefit checks are completed promptly, estimates are delivered to patients on time, staff aren’t struggling to explain higher balances, and payment plans are recommended.

The number does not explain the problem. It only provides a starting point for identifying where things need improvement.

Comparing the January numbers to previous years might help with that, too.

Don’t Wait Until the Patient Is Standing at the Desk

One way to make patient payments difficult is to introduce the amount when the patient arrives. They might not have anticipated it, may not have brought the required payment method, and may have questions that can’t be answered immediately. Whenever possible, communicate expected costs ahead of the visit.

You can use a phone call, text message, patient portal message, or other approved communication method to notify patients ahead of time of the amount they’re likely to be charged. The communication method will vary by practice and policy; the goal is no payment surprise when it can reasonably be avoided.

What If the Patient Cannot Pay?

What If the Patient Cannot Pay

A patient who cannot pay the full bill is not necessarily a difficult collection case.

First, staff need to remind the patient of the practice’s standard payment policy. If a payment plan is an option, they should discuss the details and provide the necessary information. Moreover, patients who cannot pay their balance in full may be eligible for financial assistance. Staff should inform them of the eligibility criteria.
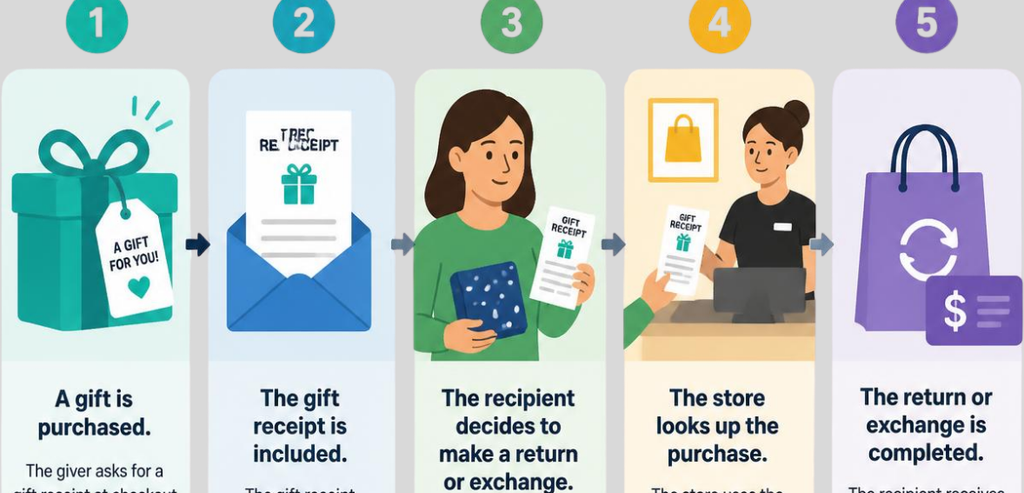
However, in all cases, employees must treat patients according to the same standard. If one employee offers arrangements that another cannot, the practice will look inconsistent.

Train Staff Before January Arrives

A brief training session before the new year can prevent many issues.

Brush up on processes for verifying benefits, patient estimates, payment collection, failed cards, and explaining payment plans. This is a good time to let staff practice answering questions about deductibles and patient balances.

It is also a good time to review any updated internal guidelines. If your practice made any changes to the payment policy, payment plan procedures, or communication methods, make sure all employees are up to speed.

A Simple Q4 Checklist

Before the new year begins, revisit your insurance verification process and ensure that your staff knows what to do if a new plan comes up. Also identify any upcoming appointments where benefit verification may help. Review your patient payment policies to ensure you’re estimating costs accurately, getting your patients’ permission to put their cards on file when appropriate, and offering payment arrangements.

Your front desk should also be well-versed in frequently asked questions about deductibles and know when to send a patient to their insurance company. Finally, decide what numbers you want to track in January, such as your time-of-service collections and outstanding patient balances. These updates shouldn’t feel overwhelming. They have to happen before the end of the year.

Conclusion

A deductible reset can make January a lot harder for patients and your medical practice. But the good news is: your front desk can prepare ahead of time to make the transition as smooth as possible.

Here are five things you may want to do: check the benefits, discuss expectations, collect payments consistently, review card-on-file permissions, and keep payment-plan information handy. But most importantly, don’t procrastinate until January. Q4 is when you set the tone for the following year, so bring your team together, review the payment policy, and learn about the pain points your practice experienced last year.

Prorated Rent

Prorated Rent in Five Minutes, With Both Formulas

Most leases start on the first of the month because it keeps the math simple. But plenty of tenants move in on the 10th, the 15th, or the 20th, and the first question is always the same: how much rent is owed for that partial month?

The answer is prorated rent, sometimes called partial rent. The tenant pays only for the days they actually occupy the unit. The complication is that there are two accepted ways to calculate it, and they do not always give the same number.

This guide walks through both methods for prorated rents with worked examples, then covers move-outs, February, 31-day months, and the fees that should not be prorated at all.

What Is Prorated Rent?

What Is Prorated Rent

Prorated rent is the portion of a month’s rent owed when a tenancy starts or ends partway through the month. If the monthly rent is $1,200 and the lease begins on June 15, the tenant owes rent for June 15 through June 30, not for the whole of June. How that partial amount is calculated depends on which method the lease specifies, which is why the lease should say.

The Two Methods

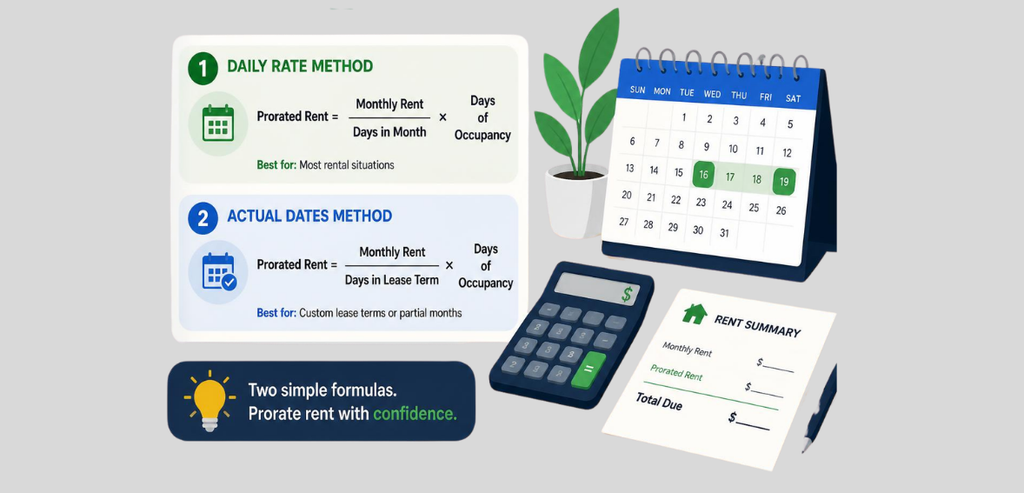
The actual-days method divides the monthly rent by the number of days in that particular month, then multiplies by the number of days the tenant is responsible for. The 30-day method, sometimes called a banker’s month, treats every month as 30 days regardless of the calendar, then multiplies by the days of occupancy. The lease should state which one applies, and some local landlord-tenant rules require a particular method.

Method 1: Actual Days in the Month

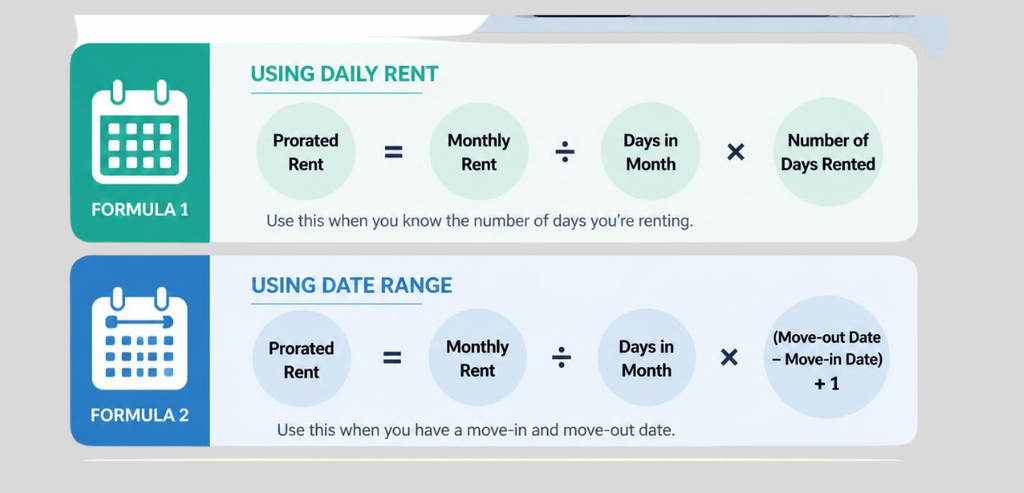
Formula: monthly rent ÷ days in the month × days occupied = prorated rent.

Example: rent is $1,500, and the tenant moves in on June 15. June has 30 days, and the tenant is responsible for 16 days (June 15 through June 30). $1,500 ÷ 30 = $50 per day. $50 × 16 = $800.

Method 2: The 30-Day (Banker’s) Month

Formula: monthly rent ÷ 30 × days occupied = prorated rent.

Same example: $1,500 ÷ 30 = $50 per day, and $50 × 16 = $800. In a 30-day month, the two methods agree. They only diverge when the month has 28, 29, or 31 days.

Actual Days vs. 30-Day Method in a 31-Day Month

Take July. Rent is $1,500, and the tenant moves in on July 15, so they owe 17 days (July 15 through July 31).

Actual-days method

$1,500 ÷ 31 = $48.39 per day. $48.39 × 17 = $822.58.

30-day method

$1,500 ÷ 30 = $50 per day. $50 × 17 = $850.

The difference is $27.42, and it lands on the tenant. With enough units and enough mid-month moves, that gap is why landlords and tenants argue about the method.

Why the Lease Should State the Method

Why the Lease Should State the Method

A lease should say which formula applies before anyone moves in. If both parties know it is actual days, or know it is a 30-day month, the calculation is a two-minute job. Without that line, each side reaches for the method that favors them and a small dispute is built in from day one.

Before running the numbers, read the rest of the lease as well. Requirements about first and last month’s rent, the official start and end dates, and any additional fees can change what is due. If the lease is silent on proration, the landlord-tenant rules of the state where the property sits may decide.

How to Calculate a Mid-Month Move-In

Start from the day the tenant takes responsibility for the unit. Confirm the monthly rent and check which method the lease names. Divide the rent by the days in that month (actual-days) or by 30 (30-day), then multiply by the days the tenant is responsible for.

Example: rent is $2,000, and the tenant moves in on August 20, so they owe 12 days (August 20 through August 31).

Actual-days: $2,000 ÷ 31 × 12 = $774.19.

30-day: $2,000 ÷ 30 × 12 = $800.

The amounts differ because August has 31 days.

How to Prorate Rent When a Tenant Moves Out

How to Prorate Rent When a Tenant Moves Out

A move-out before the end of the month works the same way in reverse: pick the method the lease names and count the days from the first of the month through the move-out date.

Example: rent is $1,500, and the tenant moves out on July 10, owing 10 days (July 1 through July 10).

Actual-days: $1,500 ÷ 31 × 10 = $483.87.

30-day: $1,500 ÷ 30 × 10 = $500.

What About February?

February has 28 days, or 29 in a leap year, so the actual-days method produces a higher daily rate than it does in any other month. If rent is $1,400 and a tenant owes 14 days in a 28-day February: $1,400 ÷ 28 = $50 per day, and $50 × 14 = $700. Under the 30-day method, the same tenant would owe $1,400 ÷ 30 × 14 = $653.33. February is the one month where the 30-day method favors the tenant.

Rent in a 31-Day Month

In a 31-day month, the actual-days method divides by 31, and the 30-day method divides by 30, so the actual-days daily rate is always a little lower. At $1,500 rent, that is $48.39 per day versus $50. The same number of days of occupancy produces a lower bill under actual days, which is why tenants moving in during a long month tend to prefer it.

Are Fees Prorated Like Rent?

Not necessarily. Rent is charged for the days the tenant holds the unit, but parking, pet, utility, and amenity fees may be billed on their own schedule, monthly, weekly, or as a one-time charge, and a lease can reasonably say that a flat monthly pet fee is due in full regardless of move-in date. Do not assume every line item prorates because the rent does. Check the lease, and if it is silent, check local rules.

Conclusion

Prorated rent is simple arithmetic once you know which formula applies. The actual-days method uses the real length of the month; the 30-day method treats every month as 30 days. With $1,500 rent and 17 days in a 31-day month, that is $822.58 versus $850. Put the method in the lease, count the days carefully, and show the calculation to the other party. Fees and early move-outs may follow their own rules.

For more on prorated rent and other property management payment questions, see Property Management Payment Resources.

Gala Payment Test Run

The Week-Before-the-Gala Payment Test Run: A Fundraising Event Checklist

Annual fundraising galas rely on a narrow window of opportunity to raise money. The paddle raise can take less than 30 minutes. The live auction can take less than an hour. And the moment most of that money is actually collected, at the check-out desk, occurs as guests prepare to leave. Sponsorships and ticket sales are settled in advance; the paddle raise and auction money is collected at the desk. Any disruption at the check-out desk can result in lost donations that are nearly impossible to recover.

Disruptions at the check-out desk are largely preventable. Testing payment solutions, networks, and back-end systems can be done days or weeks in advance. This guide discusses a gala payment test run and provides a description of the tests, what each test is intended to determine, and provides a reference to related guidelines published by payment processors and the IRS.

Gala Payment Test Run: Why a Week Out Is the Right Time to Test

A week’s notice is typically enough time to change some venue settings, print new forms, or order a replacement reader. The results from a test run the day before, though, can’t be acted on.

Some timing is determined by the reader vendors. Many smart readers must have connected to the processor recently, sometimes within the last 24 hours, before they are allowed to take payments offline. Readers whose software has not been updated in a month or more can be blocked from processing at all. And a reader that has sat in a drawer since last year’s gala may need to be re-registered before it will work. It needs to come out now, not the night before.

image 54

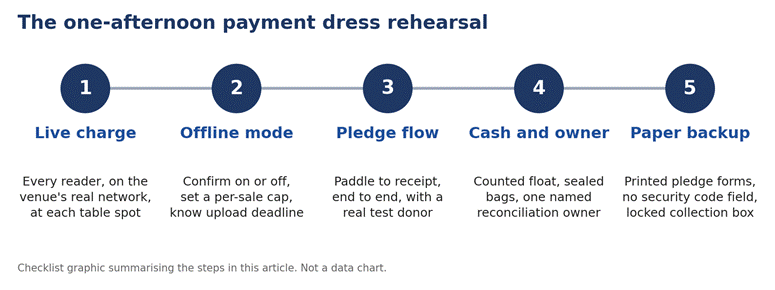
Figure 1. The five checks covered in this guide.

Run a Live Charge on Every Card Reader, on the Venue’s Actual Wi-Fi

Run a Live Charge on Every Card Reader, on the Venue’s Actual Wi-Fi

A demo mode test turns on the reader. This test does not prove communication with the processor from the ballroom. The real test is running a charge on a card through the processing system with the reader. This test is performed at all locations where a reader will be placed, including the registration table and auction check-in/out tables. Finally, the charge is refunded.

Most problems occur during processing. Some venues use guest Wi-Fi that requires a captive portal, the kind that opens a web login page, and most card readers cannot get through one. It is important to get a non-guest network that does not require a captive portal, and to get its name and password in writing.

Vendor documentation for smart readers also commonly warns that readers may not support the newest Wi-Fi standards, need WPA2 or WPA3 password protection, must sit on the same local network as the point-of-sale device, and can be blocked when a venue’s access points isolate wireless clients from each other.

The standard workaround, and the standard troubleshooting step, is a mobile hotspot. Test communication between your POS system and each reader, and write down the location of the reader, the network it was connected to, the time, and whether the charge was approved. Then test each reader again on a mobile hotspot.

Know the Offline Mode and Its Risks

While the app is in offline mode, the reader continues to scan cards, even in the case of an internet outage. The cards are collected and sent to the processor when there is an internet connection. Until then, the cards are not authorized. Expired, frozen, or over-limit cards are indistinguishable from good cards. Therefore, a guest walks out with the item, and the charge may never go through.
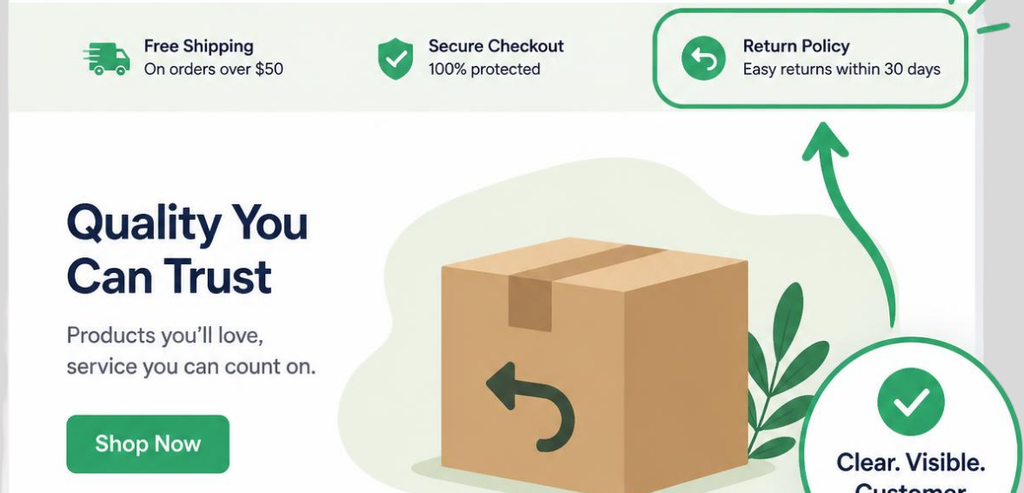
Before the event, decide whether offline mode will be on at all, and if so, set an upper limit per transaction. It is also a good idea to decide when the devices will be reconnected and by whom.

Rules vary by provider, and this is where reading your own processor’s documentation a week out matters. Some rules are close to universal. Offline payments must be uploaded within a set window, and 72 hours is a common outside limit; once stored payments expire, they cannot be recovered or processed. The organization, not the processor, usually bears the loss on an offline payment that later declines, and the processor generally will not hand over the customer’s contact details so you can chase it.

Per-transaction caps apply, and the cap is usually configurable down to whatever amount you are comfortable losing. Certain payment types are never accepted offline, commonly manually keyed card numbers, gift cards, wallet payments, and some debit networks. And on most platforms, logging out of the app, switching accounts or locations, deleting the app, or resetting the device destroys stored offline payments before they upload.

Setting a low offline cap on the auction checkout table limits the loss from any single transaction that later declines. Large donors can always be solicited through other means, including a pledge form.

Test the Pledge-Capture Flow End to End

Test the Pledge-Capture Flow End to End

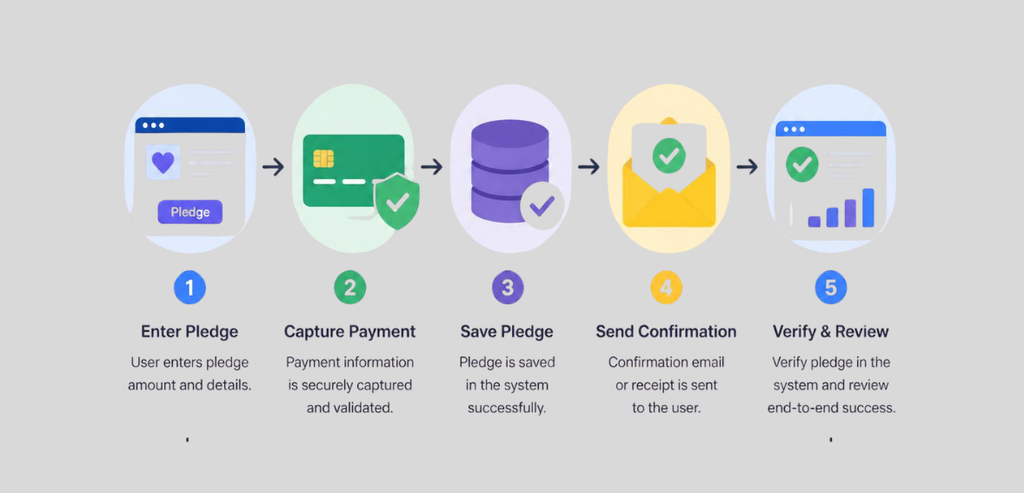
The quickest way to raise funds is by taking pledges. Traditionally, a pledge drive will raise a significant number of pledges in a short amount of time. To really understand the process, you should follow a single pledge from the time a paddle is raised to the time the donor receives a receipt. You can designate a staff member to be the test donor and use an actual card.

Observe each of the following steps. Record the paddle number and amount. The data entry volunteer will match the paddle to the guest record. The system will process the payment or generate a payment request. The donor will receive a receipt. Determine how long it takes for Finance to process the payment. Note any discrepancy between the paddle number or amount and the donor record.

It is less expensive to collect pledges electronically at the event than to key card numbers by hand afterward. Most processors publish a lower rate for a card tapped, dipped, or swiped through a reader than for a card number keyed in or entered online, so a pledge captured at the table costs less to process than the same pledge chased by phone the following week.

The receipt step includes legal requirements. IRS Publication 1771 (Rev. 11-2023) states that an organization must provide a disclosure statement to the donor when a payment of more than $75 is partly a contribution and partly for goods or services (for example, a gala ticket or an auction item). The statement must provide a good faith estimate of the fair market value of the benefits provided to the donor. The IRS may impose a penalty of $10 per contribution, with the total penalty not exceeding $5,000 for a particular fundraising event, if the statement is not provided.

The statement must be provided in connection with the solicitation or the receipt of the payment. In addition, to claim a charitable contribution deduction, a donor must obtain a written acknowledgment from the organization for any donation of $250 or more. The receipt step must therefore include a field for fair market value on tickets and auction lots. For the organization’s own tax position, the accountant or tax lawyer should be consulted.

Assign a Cash Float and a Reconciliation Owner

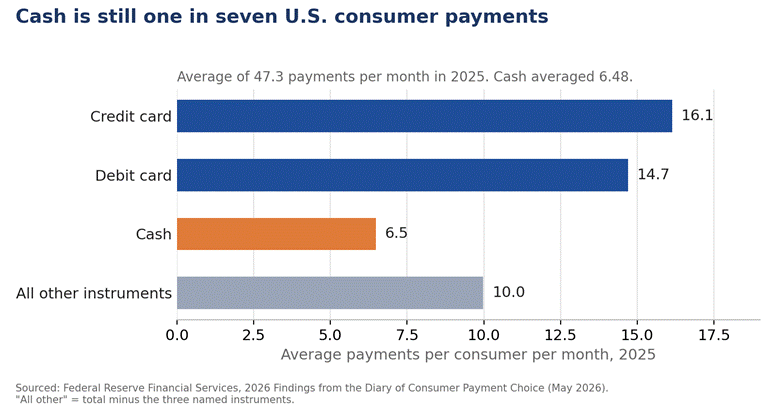
You will still find cash at galas. The Federal Reserve’s 2026 Diary of Consumer Payment Choice reported that the average American made 47.3 payments per month in 2025. Of those, 6.48 (or 14%) were made with cash. About 80% of consumers made a cash payment within the last 30 days, and about 76% reported carrying cash, averaging about $69.

image 55

The beginning cash in a cash drawer is known as the cash float. Floats must be counted, signed off, and logged before being handed to cashiers. Log deposit bag numbers and seal the bags. At the end of the event, floats must be counted and signed off by the same two people.

Reconciliation of all cash and payment transactions is the responsibility of the reconciliation owner. The owner compares cash counts, payment transaction totals, and the pledge and auction results against processor reports to ensure all the numbers agree. The owner must have access to every processor dashboard, sets the deadline for resolving any communication issues with the processor, and is the person who makes sure every offline payment is uploaded inside the processor’s window, typically 72 hours at most.

Print the Backup Paper Pledge Forms Nobody Wants to Need

A backup system is for when other systems fail. For fundraising, that system is a paper-based one. Traditionally, a paper form captures the donor’s name, contact info, and pledge, and is signed by the donor. Payment options may include a linked or mailed payment, an invoice, or a check.

Payment cards contain sensitive information, and forms used to capture that information are subject to data security rules. Card verification codes are the clearest example and should never be captured on a form. If a form captures a full card number, it should not be retained; process the payment and destroy the form. Other sensitive data should likewise not be captured or kept by the organization.

A payment card number may be replaced by an email address on the form. Payment by email link may then be arranged for the next business day, which also carries a lower processing cost than keying the card number by hand.

To maintain adequate forms for the event, a sufficient number of payment request forms should be printed, and sequentially numbered so that every form can be accounted for. One form should be tested by event staff to ensure there are no issues with the form or follow-up processes.

The One-Page Checklist

Print this list and work through it in one afternoon, a week before the event.

  • Get the written documentation of the wireless network name and password for the venue’s password-protected network, and verify that the network has no captive portal.
  • Perform a series of small charges and refunds on each reader at each table on that network.
  • Test each reader with a mobile hotspot.
  • Install the latest reader software and connect the readers to the venue’s network.
  • Determine the mode and settings for each reader.
  • Walk one paddle from the pledge area to the receipting area and time each transaction.
  • Verify that the receipt templates for tickets and auction items include the fair market value.
  • Count and sign out the float with two people and log the deposit bag number.
  • Name the reconciliation owner and give that person admin access to all accounts.
  • Use a numbered collection sheet and a closed collection box for pledge forms.

What Happens After the Event

This test run is for the week that precedes your event. The night after your event requires a number of tasks, including uploading offline donations, resolving declined credit card authorizations, collecting open pledges, sending acknowledgment letters, and reconciling your donation records. Our fundraising event close-out guide provides more information about each of these tasks.

Conclusion

Payment failures during a gala tend to come from a small number of causes, which can be identified and resolved in a relatively short amount of time. Often, a reader is unable to connect to the venue network. Transactions are sometimes stored offline and settled after a guest has left the venue. A pledge is sometimes matched to the wrong guest record.

Cash is sometimes not counted, or paper forms contain information they should not. These issues can all be identified during a test run. Offline payments typically have a 72-hour window to upload, and many readers must have connected recently before they will take payments offline at all.

For more on the pre-gala payment test run and other nonprofit payment questions, see Nonprofit Payment Resources.

Frequently Asked Questions

  1. When should we test payments for a gala?

    A week in advance leaves time to address issues with the payment setup. That includes replacing a card reader, changing venue network settings, or reprinting forms.

  2. Can card readers work with a hotel guest network?

    Not always. Many card readers cannot get past a captive portal and need a password-protected network to connect.

  3. Is it safe to use offline payment processing for charity auctions?

    In offline mode, the organization typically bears the loss if a stored payment later declines. Set a low per-transaction cap to keep that risk small.

  4. Who should be responsible for reconciling payments at a fundraising event?

    One individual should be in charge of reconciling all payments at the event. This individual should review the totals of the processed payment transactions and the cash and pledge receipts.

  5. Should pledge forms collected at a fundraising event contain card security codes?

    No. The card security code should not be collected, as this information is not to be stored by the organization.

Vendor Payments

Paying the Caterer, the Band, and the Rental Company After the Event

The event is over, and the guests are gone, but for event business owners, the real work starts right after.

Behind every successful event is a line of vendors waiting to be paid. The caterer wants their final payment, the band/DJ wants their balance, and the rental company wants payment for their tables, chairs, equipment, or décor. If you don’t handle these payouts correctly and promptly, the days after the event can turn into a disaster of invoices, emails, payment reminders, and unanswered questions.

Vendor payments don’t have to be complicated. The key is to organize vendor information beforehand, agree on payment terms in advance, pay through a trusted method, and keep a record of every payment. Including these in your event workflow from the start makes paying vendors a normal part of your event closing process.

Start Collecting Vendor Information at Booking

Start Collecting Vendor Information at Booking

Vendor payments become much easier when you collect the necessary information before the event. Asking for a tax form, an invoice, or payment or mailing details after an event can slow down the entire payout process.

When you book a vendor, collect the information you’ll need later. This information includes the vendor’s legal business name, contact details, invoice, payment instructions, and a completed Form W-9, if applicable. Keeping these on file saves your team the hassle of starting from scratch when making a payment.

A vendor W-9 is crucial for any company that must report payments to the IRS. This form contains vital information, including the vendor’s name and taxpayer identification number. Collecting it when the vendor relationship begins ensures your accounting department has the information it needs and avoids chasing vendors at an inopportune time.

Agree on Payment Terms Before the Event

Don’t overlook payment terms when finalizing vendor contracts. Make sure both parties understand all payment terms for services.

Some vendors may request a deposit at booking, which will be applied to the final payment, while others may split the total into a payment at booking and a balance due before or after the event. The agreement should also specify total sums, deposits, payments, due dates, and any cancellation terms.

Clear terms benefit both parties: the event business knows when to pay out, and the vendor knows when they are due to be paid. This also helps with cash flow forecasting rather than leaving multiple large invoices to clear after the event.

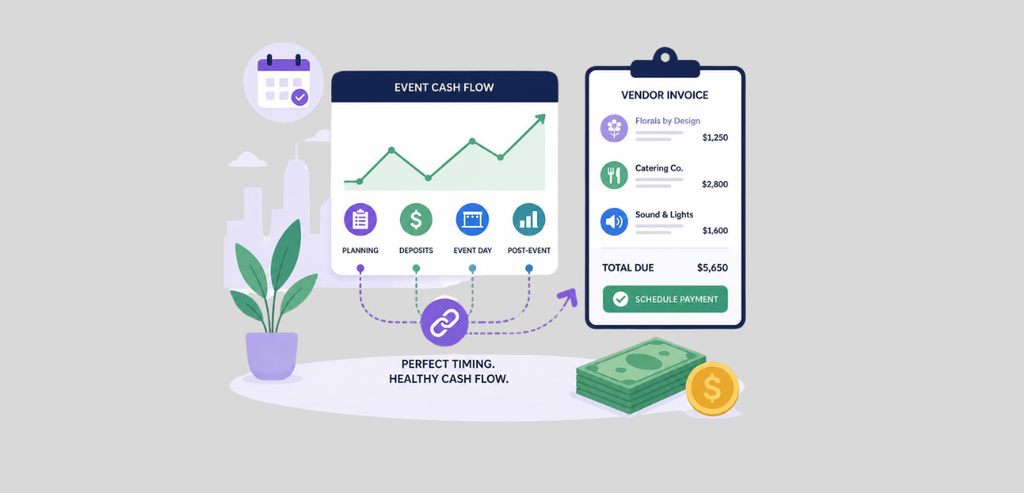
Match Vendor Payments with Your Event Cash Flow

Match Vendor Payments with Your Event Cash Flow

One effective way is to align your vendor payment schedule with your event payment schedule. If your client pays a deposit upon booking and the balance closer to the event date, your vendor contracts should reflect the same cash-flow-friendly schedule. You don’t want every vendor’s full payment falling due right after the event, when the client hasn’t paid the balance yet. Avoid these imbalances.

Of course, this does not mean you can hold back payments that are due. It means negotiating terms with your vendors in a way that makes financial sense for your business at all times.

Keep Vendor Invoices in One Place

A common reason vendor disbursements become problematic is that invoices and payment details are scattered across emails, texts, paper files, and the accounting system. Create a single, shared location to store all vendor invoices and payment information.

For every vendor, you should be able to see the amount they will be paid, the amount already deposited, the amount due, the invoice number, the due date, and the payment status. This will make auditing much easier when the event closes and you need to determine the current state of affairs with every vendor. Instead of wasting time digging through hundreds of messages trying to find out if you already paid the caterer or not, it will be right there in the record. A central system also reduces the risk of paying the same invoice twice or forgetting a smaller vendor payment that was easy to overlook.

ACH Can Make Vendor Payments Easier

For many companies, ACH is a good option for vendor payments because, instead of mailing paper checks, the business sends money electronically to the vendor’s bank. In addition, ACH payments can reduce paperwork and make payment information easier to access and track.

It can give vendors certainty about when they’ll get paid if the company is clear about when a payment has been sent and when it’s due to arrive.

However, ACH payments are not always instantaneous. Processing time can vary widely based on factors such as the payment processor, the type of ACH transaction, weekends, holidays, and other variables.

Your objective should be to determine how much money to pay vendors, when it is due, and whether your business will have the money on hand then.

That is why businesses should avoid telling a vendor that money will arrive “immediately” unless the payment service actually supports that timing. A better practice is to give the vendor a clear payment date and allow enough time for processing.

Tell Vendors When They Can Expect Their Money

Clear communication is one of the simplest ways to avoid vendor payment inquiries. Tell vendors when you’ll send payment after you approve an invoice and when it should land in their account. This matters especially with ACH transfers, since the payment date and the clearing date can differ.

Clear communication builds a positive working relationship. It saves your staff time by eliminating repetitive payment status inquiries.

What If a Vendor Sends an Invoice Late?

Late invoices may complicate matters if your accounting department needs to close out an event. The vendor agreement should specify invoice due dates and required information. If an invoice is late, check whether the vendor’s payment terms are still valid and whether the invoice requires approval.

Don’t assume you should pay an invoice just because it has arrived. Make sure the invoice amount matches your contract and that it accounts for any deposits and previous payments.

Keep Deposits and Final Payments Separate

Keep Deposits and Final Payments Separate

Create separate journal entries for vendor deposits and the balance due. This keeps all payments to a particular vendor together, giving you an up-to-date record of what has been paid and what is still owed.

At the end of the event, confirm the amount due to each vendor by comparing the initial contract with the final invoice, including the deposit amount, any approved variations, extra charges incurred, and the balance due. This is especially important if there are any variations during the event, such as extra guests, equipment, hours of performance, or additional services rendered.

Review Changes Before Paying the Final Balance

Events always have last-minute changes. Clients add services, increase or decrease guest counts, extend the event, or request additional equipment. These last-minute extras show up on your vendors’ invoices. Before you pay that final balance in full, make sure those extras were approved and accounted for in your contract, agreement, or change order. It doesn’t mean you should intentionally complicate things for vendors. It just means your business should clearly know what it is paying for.

A quick review can identify duplicate charges, incorrect quantities, or unapproved costs before the payment is issued.

Create a Vendor Payout Log

A vendor payout log will make the event closing process much easier. The log should list each vendor, invoice, amount, deposit, balance, payment date, payment type, and status. The log should also note any invoice paid in more than one installment. The idea is simple: in case of a dispute at the event’s close, anyone on your team has a complete overview of the payments and their current status.

This will also help your accounting team reconcile payments with bank transfers and invoices. If a vendor asks about a payment, your accounting team can easily access the document.

Close the Event’s Books After Vendor Payments

After paying all vendor invoices, analyze the event’s financial statements. Double-check each invoice to ensure it’s recorded correctly, deposits have been applied, and all amounts due are noted. Compare the figures from your income statements to those in your expense reports. This will show how much the event made after paying vendors and covering other expenses.

In addition, a well-documented closeout report will become a valuable planning tool for future events. It can help you apply what you learned if expenses such as catering, entertainment, and rentals were higher than expected so that you can set more realistic pricing and budgets for similar events in the future.

Don’t Forget About 1099 Reporting

Vendor payments sometimes require tax reporting and documentation. Companies should track all payments to business vendors throughout the year, rather than saving them for tax season.

Whether a payment requires an IRS report depends on several factors. These include the nature of the payment, the vendor, the amount, and relevant tax laws and regulations. Therefore, companies should consult their tax professionals or review IRS resources for up-to-date information on reporting requirements.

What About Net 30 Vendor Terms?

Some vendors use Net 30 or other payment terms. This means that the invoice is usually due within the specified number of days from its issue date, as per the agreement. If your company works with such vendors, it is critical to set reminders for their due dates. Relying only on memory or an email in the draft folder is not enough.

For companies that work with many vendors, even a few invoices with Net 30 terms can be hard to track if they aren’t consolidated in one place with the other bills.

Conclusion

An event may end as guests depart, but the financial stress for business owners doesn’t end until they pay vendors and close the event’s financial records. If you’re an event business owner, discuss vendor payments long before the event date, not as an afterthought. Collect W-9s and payment details in advance, establish and agree on payment terms, apply deposits and payments to invoices, and select a payment method that leaves a digital paper trail for both parties.

ACH is a convenient option for many vendors. However, it is critical to communicate clear timelines to payees. They must understand when their payment is being processed and how long it will take before they can expect to see the funds in their accounts.

Finally, keep an updated payout log and close the event’s books after you’ve made all payments. This will help you track event spending and simplify tax and accounting at the end of the fiscal year.

Holiday Pay

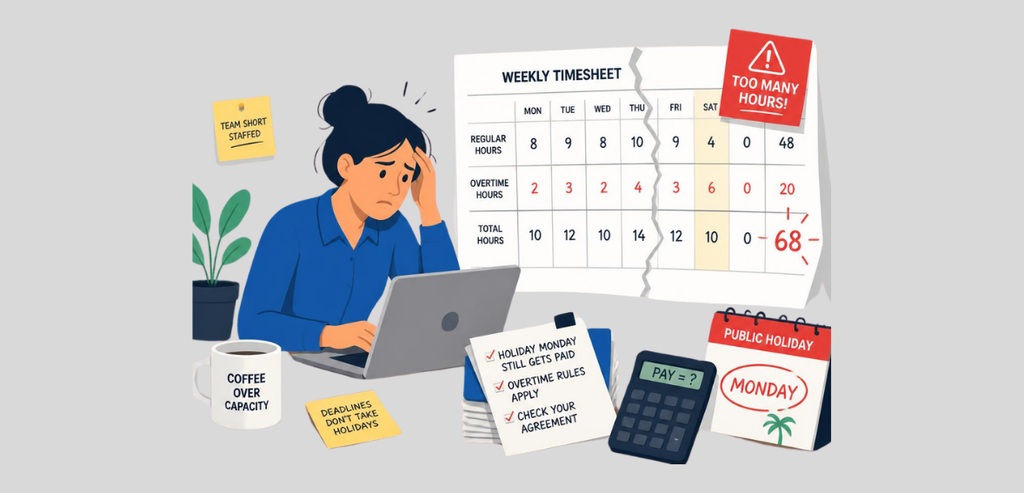
Holiday Pay, Overtime, and the Week the Timesheet Breaks

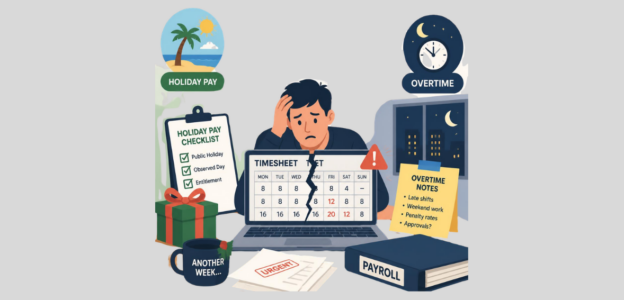
Start with a small payroll puzzle. An employee got holiday pay in a week where he also put in 40 regular hours. Is any overtime due? Answering that means understanding how paid holidays and overtime interact. That’s the major part of holiday payroll that can be a little tricky.

Understand the difference: paid time and time actually worked are two separate things. No federal statute obliges employers to offer paid holidays. And the FLSA counts only hours an employee genuinely worked past 40 in any week toward overtime.  That’s one big tangled knot, which makes a holiday week payroll confusing.

Here is what it takes to run holiday payroll with confidence.

Defining Holiday Pay

Defining Holiday Pay

Federal law does not make employers give workers time off, paid or otherwise, for Christmas, Thanksgiving, or any other holiday. Nor does it make employers pay a special rate to staff who work those days. Holiday pay is a voluntary compensation or benefit that an employer offers employees during holidays, such as Christmas, Thanksgiving, or Labor Day. Where it is offered, it usually takes one of two forms:

  • Paid leave (PTO) that covers the holiday itself
  • A higher rate, such as time-and-a-half or double time, when the employee does work the holiday

Where Federal Law Stands on Paid Holidays

This section spells out the federal position. The Labor Department puts it plainly: nothing in the FLSA compels private companies or small business owners to pay staff for hours they did not work, whether that is a vacation day or a holiday. Whether to pay is the employer’s decision, or something the employer and the worker settle between themselves.

Is Holiday Pay Counted Toward Overtime?

This is a valid question because many employers get confused when creating payroll for holiday weeks. As stated previously, overtime under the FLSA attaches only to hours genuinely worked past 40 within a workweek, never for paid hours in which no work was done.

For example, one employee puts in eight-hour days, Monday to Friday. The company was closed on Thursday for a paid holiday. Because it was a paid holiday, the employee gets paid for a full 40 hours but actually worked 32 hours, excluding the Holiday. So his final paycheck will also show 40 paid hours, as the company voluntarily decided to give a paid holiday on Thursday. Therefore, the employee will not receive overtime, because only 32 of those hours were actually worked.

What Happens When Actual Hours Exceed 40?

Let’s take one more example,

Suppose the same employee gets an eight-hour paid holiday and also logs 44 real hours across the rest of the week.

That is 44 hours of actual work plus an eight-hour paid holiday. For federal overtime purposes, those holiday hours generally drop out, leaving four worked hours above the 40-hour line. At a $20 regular hourly rate, the basic federal overtime rate would be $30 an hour for those four hours, assuming other forms of compensation didn’t affect the regular-rate calculation.

That comes to $120 in overtime, on top of regular wages and the holiday itself. The point of the example: overtime kicked in because actual work exceeded 40 hours, not because paid hours crossed 40.

Why Holiday Weeks Cause Timesheet Chaos

Why Holiday Weeks Cause Timesheet Chaos

The biggest reason for payroll complexity is the timesheet. For example, an employee might expect to receive a paycheck for eight hours that he assumes will be counted as overtime. But that’s not the case; the difference between hours genuinely worked and hours paid has to be understood. These two are different things.  The same principle applies to other forms of compensated time off. Vacation, sick leave, and holidays all increase paid hours without increasing the hours an employee actually worked for federal overtime purposes.

Your payroll system should distinguish between hours worked and holiday hours. Distinguishing between these two makes it easier for your payroll personnel to calculate overtime compensation and explain the calculation should an employee raise questions.

Build a Clear Paid Holiday Policy

Build a Clear Paid Holiday Policy

Every business owner should create a clear paid holiday policy to prevent future confusion and avoid answering employees’ emails about holiday work pay. First, identify paid holidays, such as Christmas, New Year’s Day, Thanksgiving, or other holidays that you may feel are important for your business.

Then clearly explain what happens when a holiday clashes with a weekend: whether an employer offers an alternative day off, and what kind of paid holiday the company is offering.

Decide Whether Your Company Offers Holiday Premium Pay

If your company stays open during the holiday season, plan how you’re going to compensate staff who cover those holidays.

Some businesses pay their standard hourly rate, while others offer a holiday premium as a bonus for covering a day when many people would otherwise be off. No federal requirement mandates time-and-a-half or any other premium for holiday shifts.

If a business chooses to offer such a holiday premium, it should clearly document the policy. That way, every employee knows which holidays they qualify for, who qualifies to earn the premium, and how much a holiday shift pays. This is especially important for businesses with more than one manager, so different supervisors don’t give different answers.

Keep Holiday Payroll Records Separate

It’s important to place extra focus on holiday week payroll. It should not be an uphill battle to work out which employees have qualified for overtime in a holiday week. For instance, a payroll record showing “48 hours” doesn’t provide enough information if eight of those 48 hours are paid holiday time. A better payroll record would show 40 regular hours worked, 4 overtime hours worked, and 8 paid holiday hours.

Doing so would make the payroll process more transparent and give the employee a clear explanation of how the final paycheck was calculated. It will also allow the employer to spot mistakes before finalizing a payroll record, rather than trying to detect them after an employee has been paid.

Don’t Forget State and Local Rules

Federal FLSA rules matter when creating a holiday pay premium policy, but it’s equally important to include employment agreements and other state and local wage-law arrangements that can also affect holiday pay. Certain federal contracts can have their own requirements. That’s why, to avoid errors, businesses should check the requirements that apply to their employees, location, and industry, rather than relying on the federal standard to answer every holiday pay question.

If you are unsure about how a holiday premium, paid holiday, or overtime calculation should be applied, you should consult a payroll professional or employment-law adviser before processing the affected payroll.

A Simple Holiday Payroll Check

Before finalizing the paycheck during a holiday week, pause and take a few minutes to review the timesheet carefully. Check which employees got a paid holiday and determine whether they qualify under the company’s policy. Then separate the paid holiday hours from the hours employees actually worked.

Next, check whether any of your covered, nonexempt employees logged over 40 worked hours during the workweek. If yes, calculate overtime by applying applicable federal and state rules and consider any other compensation that may impact the regular-rate calculation.

Finally, review if your company’s holiday policy is applied consistently. Should an employee ask why no overtime appears when paid holidays pushed their total past 40, explain the difference between hours of paid leave and hours worked.

Conclusion

Holiday payroll shouldn’t be complicated once you separate paid holidays from overtime. Federal law does not oblige private employers to provide paid holidays. Nor does a holiday shift automatically earn premium pay. Federally, overtime applies only when actual work exceeds 40 hours within the week.

The best way to avoid holiday payroll chaos is to create a holiday policy before the holiday arrives. Include every detail, such as how an employee qualifies for holiday premium pay under your policy and how overtime will be calculated.

Mid-Contract Rate Change

Your Processing Rate Can Change Mid-Contract: How to Read a Statement for an Increase

Increases to processing fees happen over the life of a contract. Merchants are given prior notice, but it’s typically hard to find in processing statements. Many merchants don’t examine their processing statements, so it’s likely merchants are unaware that processing fees increase. During August and September of 2026, numerous merchants of two large national processors became aware of increases in processing fees by receiving statements with fee increase notifications.

Merchant Cost Consulting reported that on statements issued in August 2026, increases ranged from a few basis points to as high as 225 basis points for some merchants. Increases notified for September did not state the new rate at all. Neither processor alerted merchants to the fee increases. It is likely that the average merchant will not become aware of fee increase notifications for several billing cycles. This article about mid-contract rate change helps merchants determine when processing fees have increased.

How a Mid-Contract Rate Change Becomes Possible

How a Mid-Contract Rate Change Becomes Possible

Most merchant processing agreements state that the processor may increase fees at any time, but must notify the merchant of the increase. How much notice is required differs from agreement to agreement.

An example of one of these agreements states that the processor has the right to increase its fees in one of two ways. The first way is if a card network or another third party increases its fees or if there is a change in the law. If this is the case, the processor may increase its fees to the extent required and pass the increase on to the merchant.

The second way the fees may be increased is if the processor increases its markup. In this case, the processor is required to notify the merchant of the increase and the new fee. The increase may not take effect until after the requisite notice is provided to the merchant.

Five business days’ notice is fairly standard practice. The same part of the agreement usually provides a merchant with the ability to object within a set window and, if the merchant does so, the agreement may be terminated by the merchant without charge.

There may be other provisions in an agreement which protect a merchant; however, those protections typically come at the cost of other obligations and constraints.

Some processors provide a thirty (30) day prior notice to a merchant for any change to the processor’s schedule of fees. Other processors provide that a merchant will not be provided any prior notice for changes to interchange rates. A thirty (30) day notice for interchange changes is a goodwill provision by a processor; however, interchange rates are beyond the control of the processor. The provision provides little value to a merchant.

The August 2026 Increases

Merchant Cost Consulting reported recently that processors are raising discount rates. In the August statements of one large processor, some merchants reported discount rate increases of 5 to 20 basis points. Others reported increases of 100 to 225 basis points. Increases of that order of magnitude are not uncommon. It is typical to see small across the board increases and larger increases on a small number of accounts.

Both small and large increases require that processors notify merchants. Notification can be done by issuing an update to the affected account.

Two processors notified their merchants of rate increases in August. One processor increased rates by 0.15% to 0.40% for its merchant accounts effective August 1. Notifications for a second increase to be effective September 1 were also sent. Those notifications, however, failed to notify merchants of the new rate. That means merchants would not know their new rate until after the increase was implemented, and had no way of knowing the amount rates increased by until the next statement arrived.

Where the Notice Appears on a Statement

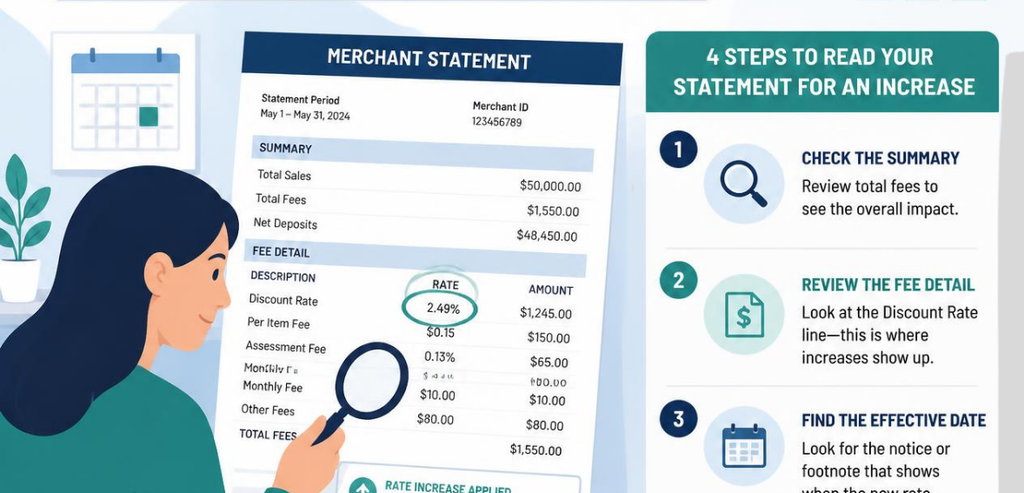
Repetitive formats and layouts abound in the design of a merchant statement. Different processors have varying amounts of sections in their statements, but many of these sections repeat across processors. Some processors publish guides explaining their statement formats. One of the repeating sections of a merchant statement is Important Messages. Important Messages typically inform a merchant of any changes affecting their merchant account or changes to how Card Association products are processed and introduced by the Card Networks.

Changes to Card Association products are referred to as Interchange Changes. Processor-initiated changes to merchant accounts may be included on the last statement page, or may be included on an attachment to the merchant statement. The attachment may also include other legal notices to the merchant, changes in terms and conditions to the merchant account and other information.

Due to different formats of merchant statements, processors may not always explicitly state discount rates charged to merchants on a statement. It may be necessary for a merchant to work out the true discount rate charged for a given card type by dividing the amount charged for that card type by the amount sold for that card type.

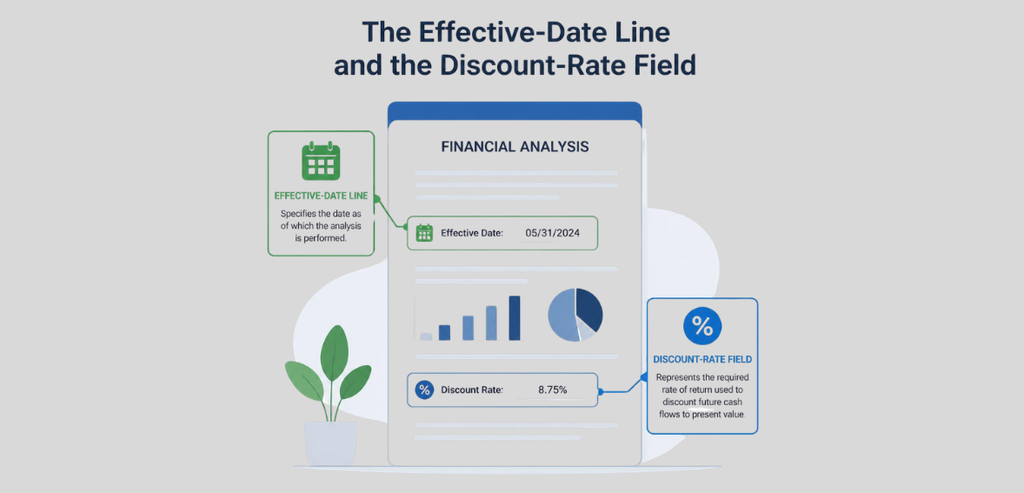
The Effective-Date Line and the Discount-Rate Field

The Effective-Date Line and the Discount-Rate Field

When reviewing changes to a rate, there are typically two clues on a customer’s statement. The first is the effective date. The rate effective date will indicate to a merchant which billing cycle to apply the new rate to. The second clue is the discount rate itself. This is shown on the Fee Summary with related fees, such as transaction fees and dues and assessments. The labels of these fees differ by processor; however, most statement guides provide explanations.

Knowing where a card network’s interchange fee is relative to a processor’s markup is important, because generally, both will change at the same time. The card networks will publish an update to interchange fees generally in April and October. Interchange is set by the card networks, not the processor; therefore, if a processor notifies you that both its markup and an interchange rate have changed, only the markup is at the processor’s discretion.

Calculating Your Effective Rate

The effective rate is what you’re looking for when you don’t know the actual percentage increase. The effective rate is total fees divided by total volume, and is usually between 2% and 4% for small businesses.

To calculate the effective rate, you first determine the total fee for the month. Next, determine the total card volume for the month. Divide total fees by total volume and multiply by 100 to get the effective rate. Repeat this each month. The effective rate is the number you want to track, and it will increase if the rate charged by the processor increases. This works even if the statement does not show a discount rate, because every monthly statement discloses the total fees and total volume. However, if the mix of card types is different or the average transaction amount changes, it could falsely appear that the effective rate increased when in fact it did not.

How Long a Merchant Has to Respond

The wording varies, and the two examples differ significantly. The first example allows the merchant to terminate the agreement within five business days following the receipt of the change notice. Additionally, the merchant may contest the charge or credit within thirty days from the billing date.

The first Merchant Agreement states that the merchant has waived their right to contest the charge and credit if no contest was made in writing. The second agreement states that the merchant may contest the credit or charge within forty-five days. The second agreement requires a ninety-day notice to terminate.

The amount charged for early termination also varies. The first agreement states that if the merchant terminates the agreement within the first year, the processor may charge an early termination fee of two hundred fifty dollars. If the agreement is terminated after the first year, the fee is five hundred dollars. The second agreement scales the fee to the time remaining on the agreement. In both agreements, a processor that is in breach may not charge the merchant to terminate. These are examples; read your own agreement for the terms that apply to you.

What a Rate Increase Actually Costs

The effect of a basis point change is proportional to the volume of card transactions. So, the effect of a basis point change is felt more acutely by merchants who process a large volume of card transactions. A 100 basis point change means an extra cost of about $30,000 for a merchant processing $250,000 worth of card transactions in a month and a 225 basis point change means an extra cost of about $67,500 for that same merchant.

A $25,000-a-month merchant incurs an extra cost of $3,000 and $6,750 for a 100 and 225 basis point change, respectively. The high volume merchant feels the increase right away. It may be some time before the low volume merchant notices the increase. The calculations presented are estimates. A merchant’s actual increase is complicated by the average dollar amount of the transactions and what kind of cards are processed.

A Statement-Literacy Checklist

A Statement-Literacy Checklist

Locating change notices usually isn’t a big problem, because most processors place notices in the same or similar locations on the different statements. Notices are usually at the end of a statement or on a notice page. If you can’t find a change notice on a statement, check to see if the discount rate on the Fee Summary is left blank. If the rate is left blank, calculate the discount rate for that card type by dividing the discount amount by the sales volume for that card type.

To find the effective discount rate for the month, divide the total discount fees for that month by the total volume for that month. This rate needs to be compared to the rate for the previous month. If the rate went up for the month and the card mix didn’t change for the month, then you can say that the rate changed for that month even if you didn’t find a change notice.

The effect of the rate change can be calculated by multiplying the rate change by the total volume for that year. The change-of-terms section of your merchant agreement describes the notice period, the right of termination and the dispute period. These do not appear on your monthly statement.

Conclusion

Notices of rate increases are generally difficult to spot. Your contract with your payment processor determines how much notice you have to have of a rate increase, your right to terminate the contract for an increase, and how long you have to dispute a charge. The contracts described here have notice periods of between 5 and 30 days, dispute windows of between 30 and 45 days, and termination notice of up to 90 days.

The effective rate, total processing fees charged to you divided by the total volume you processed during that time, is almost always greater than the rate you were quoted. It is the rate you are actually charged, whether you received a notice or not.

Frequently Asked Questions

  1. Where should I look to find information about changes to my processing rates?

    Usually, this information will be located at the end of your statement. Look in the Fee Summary, Important Messages, or Notices.

  2. How do I calculate my effective processing rate?

    Take the monthly processing fees and divide by the total monthly card volume in dollars. Multiply by 100 to get the effective processing rate.

  3. Can my processor increase my rates?

    Usually, processors can increase rates if they notify you first. Your processing agreement may allow you to terminate your processing agreement if you do not agree to the increase in rates.

  4. Will an increase in Interchange rates cause my Processor to increase my rates?

    No. Increases to Interchange rates are independent of rates charged to you by your Processor.

  5. How long will I have to respond to a rate increase?

    This will depend upon the terms of your processing agreement. In some agreements, you will have 5-30 days from the date of notice to object or terminate your processing agreement. In some agreements, you will have 30-45 days from the date of the statement in question to object to the charge.

  6. What should I do if my rate increase notice does not tell me the new rate?

    Work out your effective rate from a statement before the notice date, then again from one after it, and compare the two.

Third-Party Appointments

Letting Clients Pay for Someone Else’s Appointment

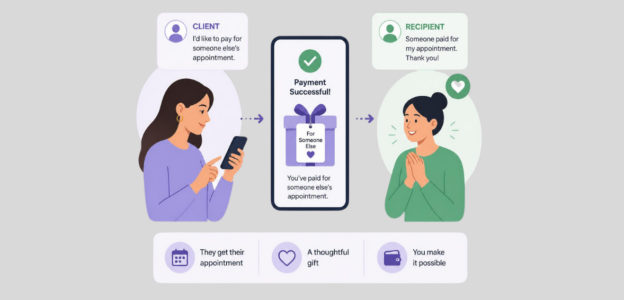
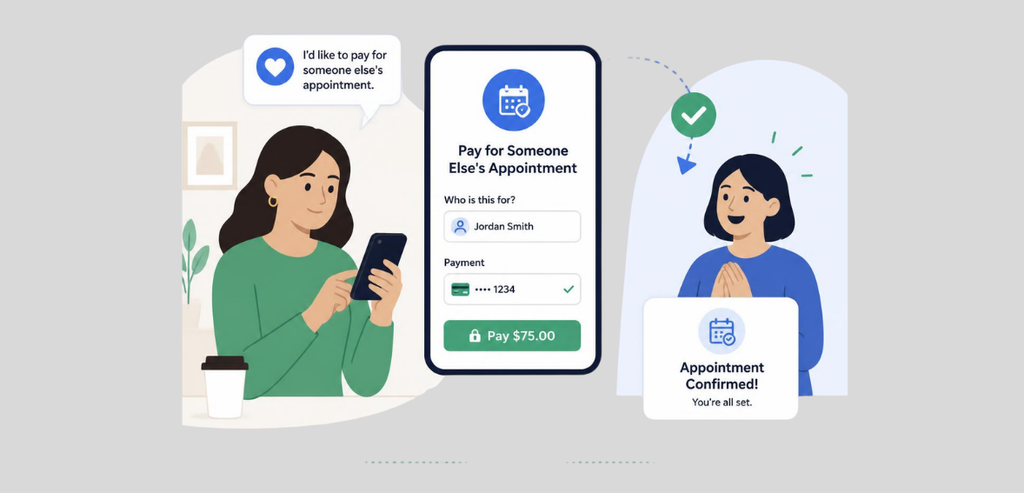
When paying for an appointment, the client shows up and takes the service; that is simple math, right? However, real chaos begins when the person booking an appointment is not the same person attending it. For example, a wife may have booked a soothing massage session for her husband, or an employer may have booked a consultation for an employee. These third-party appointments can complicate booking when the payer and attendee are not the same.

Who should receive the confirmation? Who can cancel or reschedule the appointment? Who should be charged a no-show fee if the client does not arrive? Should the money be refunded if the meeting is canceled, and who should be responsible for the charge?

These questions may not seem important when setting up an appointment scheduling system. Clear answers to these questions will help avoid misunderstandings or payment complications with customers. A well-documented process will clearly show who pays, who attends, what a payer has agreed to, and what happens if plans change.

The following guidelines will help appointment-based businesses ensure they provide excellent service by accepting third-party payments and giving both the payer and attendee a clear understanding of the booking.

Why Paying for Third-Party Appointments Needs a Clear Process

Why Paying for Third Party Appointments Needs a Clear Process

Yes, accepting a third-party appointment may seem normal, but both the payer and attendee should clearly understand the booking details and payment terms. This difference can affect the booking and payment record-keeping process when something goes wrong.

For example, imagine a husband booked a $1,500 salon appointment for his wife and paid in advance with his own credit card. However, for some reason, his wife could not show up. The salon deducted a $50 no-show fee. Who agreed to that no-show fee? Here the payer and attendee are two different people.

Here’s another scenario:

Imagine an employer pays for one of their employees’ consultations. The employee goes to the appointment, but the boss gets the receipt. Now imagine that the employee asks for a refund. Whom would you have to issue the refund to?

The billing process becomes much easier when your business keeps the record of the payer and attendee separately.

Keep the Payer and Attendee Separate

One of the best ways to manage a third-party payment appointment is to keep a record of the payer and the person receiving the service. The attendee is the person who will attend the appointment; therefore, include their name/contact details, along with the appointment booking details, so your staff knows who is attending.

The payer is the person who will pay the invoice; therefore, link their name/contact details to the invoice/payment to avoid confusion if the person booking isn’t the person paying. This difference doesn’t have to make the booking complicated. The online booking form simply needs to ask whether the person booking is the attendee, and if not, collect the attendee’s details separately.

Make It Clear Who Is Paying

For a business that runs with appointment-based booking, the staff and the payer must know who will be charged.  For example, the customer books a $150 massage for her spouse. A confirmation notice should clearly state who booked the service (the customer) and who is attending the appointment (the spouse).

This matters for third-party appointments where cancellation or no-shows are common. Also, the booking confirmation should include the no-show or cancellation fee policy so both parties are aware of it.

The payer should know the conditions they accept when providing credit/debit card details. Never assume a client booking an appointment knows your policy. Your booking confirmation message should clearly state something like, “By making this booking, you, as a payer, agree to our no-show fee or cancellation policy,” or that your card will be charged a $50 cancellation or no-show fee if you want to cancel the appointment or do not want to take the service.

Who Agrees to the No-Show Policy?

In a gift booking, a no-show fee can cause confusion and disputes if the payer or attendee does not know about it. For example, if someone books an appointment for their partner, the partner does not show up, and a no-show fee is charged to the payer’s credit card, who is responsible for it?

The best way to avoid disputes and confusion is to review your terms and policy with the payer before confirming the appointment. Confirm the booking only after the payer agrees to your policy. Additionally, your cancellation and no-show charge policy should be easy to understand. This matters because, in a gift booking, attendees may not be aware of the cancellation or no-show charge policy.

If the person who made the payment also has no clue about the charges, it may be difficult to justify why their card was charged later without their consent. Your business should also consider relevant payment, consumer protection, and local regulations when developing its policy.

Don’t Hide the No-Show Fee

A cancellation or no-show fee policy should not feel like a surprise charge. If your business charges a no-show fee or cancellation fee, disclose it before the customer confirms the booking. Your policy should include common FAQs a customer may have about your no-show and cancellation policy, such as: how much will be charged, what happens if a customer doesn’t show up for the appointment, and how to cancel the appointment without paying a fee.

Adherence to this guideline is important for a business owner and payer to avoid confusion during booking or when the charge is applied on the card. Also, make sure your booking clearly states what the payer and business agreed to. It’s better to keep the no-show fee policy visible than to bury it in a tiny paragraph at the bottom of a booking section. For more ways to reduce missed appointments and handle no-shows, see The End of No-Shows: A Salon’s Definitive Guide.

What Happens If the Appointment Is Canceled?

What Happens If the Appointment Is Canceled

Third-party bookings also raise questions if the appointment is canceled. For example, if a customer buys a facial for someone else and pays, but that person decides to cancel the appointment. A business should have a policy for these situations. 

If the person who paid for the appointment is eligible for a refund, return the funds to the original payment method according to your refund policy. Your payment provider’s refund process and your own terms should guide how these situations are handled.

Who Should Receive the Refund?

Refund processing can be confusing, as the payer and attendee are different people.  The simplest solution would be to mention your refund policy before setting up an appointment. Clarify whether the customer will receive a refund to the initial payment method and who can request a refund.

For example, if a father pays for the child’s appointment, their card will be charged at booking. If the payer cancels the appointment and is eligible for a refund, the company should have a clear refund policy and process to return the payer’s money.

Every customer is valuable; follow the same refund guidelines for every customer instead of making exceptions at the counter. Sharing a clear, simple refund policy avoids confusion and prevents unwanted disputes from both sides.

When Is a Gift Card a Better Option?

A gift booking is the right option when a payer knows exactly what service the recipient wants and when they want it. But that’s not the case for every customer, because sometimes a buyer wants to give someone $100 for a service without choosing a specific treatment or appointment. In such scenarios, a gift card can be the best option, allowing the recipient to choose the service, time, and date at their convenience.

It also avoids complications that can arise when a recipient wants to change the appointment. For businesses, gift cards offer an easier payment method when the buyer wants to give the recipient flexibility.

Gift Booking vs Gift Card: Know the Difference

Gift Booking vs Gift Card

Gift cards and gift booking serve the same purpose but work in different ways. With a gift booking, the payer selects a specific service for the recipient, and possibly the session date and time. This option suits situations where the giver already knows the recipient’s preferences and availability. A gift card gives the recipient more flexibility.

Rather than purchasing a particular service or treatment, the card owner buys a certain amount, such as $50, $100, or $200, that the recipient can spend on their preferred service and appointment.

Handle Parent and Child Bookings Carefully

Parents usually pay for children’s appointments, which can include haircuts, tutoring, salon visits, consultations, and other personal appointments. In these cases, parents usually cover the payment, while their children are the attendees who receive the appointment.

By keeping the contact and personal information of parents and children separate, it will be easy for a business to handle their bookings. The business can send parents payment information and receipts, while sending the appointment date, time, and other details to the child or student. If the appointment is with a child or a professional service for special needs, the business may also need extra approval or information. Make sure your booking system follows the regulations specific to your industry.

Conclusion

Letting customers pay for someone else’s appointment can be useful for salons, spas, tutors, consultants, wellness businesses, and other appointment-based businesses. The key is to distinguish between the person paying for the appointment and the person attending it. Make sure your customers understand your cancellation and no-show policies before they pay. You should also track who paid and who attended the service, clarify refund policies for customers, and send receipts and appointment confirmations.

If the customer wants to give someone a set amount of money instead of paying for a specific service, consider giving them a gift card. The key is that if one person makes the payment and another receives the service, the booking process should be clear to both the buyer and the attendee. Otherwise, you run the risk of a disagreement between the two parties about what was actually purchased and what amount of money was paid for it.

negative review

A Customer Complained about Your Card Fee in a Google Review: Now What?

A customer slammed your business’s review section with a one-star Google review saying, “They charge me extra for paying by card.” Your first instinct may be to explain your policy to them and point out that the charge was clearly posted.

But the review section isn’t the right place to argue, as it can leave a negative impression of your business. Responding to card fee complaints matters, and the goal shouldn’t be to prove your point. It’s to show the customer who wrote the review and everyone else reading it that your business takes customers’ concerns seriously.

A short and calm response to a negative review can protect your reputation. On the other hand, a defensive response focused on fee calculations can make things worse. If you run a business, understanding how to handle complaint reviews is important.

Never Respond to a Negative Review While You’re Frustrated

A negative review can feel personal, especially when you believe the complaint is vague or unfair. This can make you feel frustrated, and you may want to respond immediately with something like, “The fee was clearly posted” or “You should’ve double-checked our policy before paying.”

Don’t react when you’re frustrated; pause before replying. Your prospects may also read it, and how you react will strongly determine whether they will visit your business or not. Your reply should show three things:

  • You’re willing to help
  • You’ve heard the concern
  • You understand your policy

Acknowledge the Concern without Admitting Fault

The first step in responding to a complaint is to acknowledge what the customer is saying. You don’t have to agree or admit that your business made any mistakes. Make sure the customer feels understood.

For example, “We’re sorry to hear the card fee was unexpected” is very different from “You should’ve read the sign before paying.”

The first response can satisfy the customer; the second can make them feel like they’re fighting your business over money.  This approach is especially useful when you’re dealing with irate customers who have misunderstood the situation. Your goal is to make it clear that your business cares about the customer and is willing to help. Remember that potential customers are watching how your business handles criticism. A calm and respectful response can tell them much more about your business than a long explanation of payment processing ever could.

Explain Your Card Fee Policy Once

Explain Your Card Fee Policy Once

After acknowledging the concern, briefly explain your policy. If your business applies a card surcharge, there’s no need to offer a detailed breakdown of interchange fees, processor charges, network costs, or other expenses in your Google response. Those details matter to you as a business owner, but explaining the fee in public usually doesn’t help anyone understand the situation.

Instead, state the policy clearly and move on.

For example, you could say:

“Our business applies a card surcharge, which is disclosed at checkout.” That should be enough.

Don’t Turn the Review into a Fee Debate

One easy way to turn a surcharge complaint against your business into a disaster is to turn the response into a debate about why your business charges. You might be tempted to explain that your payment processor charges a certain percentage, that credit card companies have raised their fees, or that you would have to raise prices across the board for every customer if you stopped passing some costs onto card-paying ones.

A lengthy explanation will make you sound defensive, and it’ll also give the complaining customer a reason to respond, creating an unpleasant public argument for future customers to read. Stick to facts when explaining your policy and acknowledge the customer’s problem. Offer to assist in another channel if they wish to discuss the disputed transaction in more detail.

Take the Conversation Offline

Once you’ve put the basic facts on the table, try to contact your customer privately. This is especially important if the customer wants to know the amount charged, or says they weren’t aware of the fee, or claims that the fee was applied incorrectly.

You can handle the conversation by saying something like:

We’d love to help. Please get in touch with us at [email address] so we can look into this and provide a resolution.

This way, you can buy some time to investigate what actually happened without sharing transaction information publicly.

The customer may not have noticed the surcharge applied to the card. Maybe an employee forgot to mention it, or the signage wasn’t visible from where the customer was standing. Or perhaps the wrong fee was applied.

What If the Customer Complaint Is Accurate?

What If the Customer Complaint Is Accurate

A negative review isn’t always something you need to take personally or get defensive about. Sometimes it points to a genuine problem in the customer experience that needs addressing. For example, many customers leave comments such as:

  • “I wasn’t aware of the card fee.”
  • “The surcharge wasn’t clear.”
  • “I only noticed the extra charge after paying.”
  • “No one told me about the fee.”

If you’re seeing the same complaint repeatedly, don’t simply copy and paste a routine acknowledgment response.

Look at what happens at your checkout counter.

Review Your Signage and Disclosure

If your business charges a card surcharge, your customers should clearly know about it before completing their purchase. Review your signage: is it easily noticeable? Is the wording easy to understand? Is it located where customers can see it before they pay? Does your checkout process make the surcharge clear? Look from the customer’s perspective rather than from the eye of a business owner. Customers hate hidden charges and appreciate if everything is posted upfront before they make a purchase or use a service. Card network rules and some state laws also set requirements for how a surcharge is disclosed, so this is worth checking for more than just reviews.

Make Sure Your Employees Know What to Say

Your team members should also be aware of the card fee process. A customer may ask if there will be an additional charge for using a credit card. Employees who are uninformed may give a long-winded explanation, which may also include incorrect information. A confusing or incorrect answer may cause the customer to lose trust in your business. A brief description of the card fee may help staff members give answers that promote consumer trust. A written description of the policy can reduce staff members’ fear of communicating the message.

What If the Google Review Is Inaccurate?

Occasionally, a customer will post an inaccurate Google review describing a purchase. Sometimes they will say a surcharge was passed on, when in fact, your records indicate no surcharge was added. It could be that they don’t understand other charges on the receipt and think they are surcharges. In these cases, the best course of action is to explain the situation as best you can.

For example, you could respond to the situation in this way: “We have reviewed the transaction and the surcharge was not passed on. If you would like to chat about the transaction, let us know.”

Protect the Customer’s Privacy

Remember that Google reviews are posted publicly. This means that everything you post about a customer can reflect poorly on your business. You may be tempted to post a customer’s private information to support your case. Don’t post things like card numbers, receipts, phone numbers, or emails. Posting any private information can reflect poorly on your business. Be sure to keep your response professional.

What Should You Avoid Saying?

When dealing with customer complaints, watch your choice of words. Phrases such as, “You should have read the sign” add nothing to the conversation and may give the impression that you are unwilling to help solve the customer’s issue.

It is not appropriate to put the responsibility for the fee on the customer. If several customers have the same question about a business policy, it may mean that the policy or the language it is written in is not clear. You should not try to argue the policy in a public setting.

It is best to limit the information you provide in a public setting. If you determine that further discussion is necessary to resolve the complaint, you may want to suggest that the customer contact you directly. In such a case, thank the customer for their time and close the public discussion.

Two Simple Review Reply Templates

Having a few review reply templates available can make responding to similar complaints easier. You can adjust the language depending on the situation and your business’s usual tone.

Template for a Factual Card Fee Complaint

Thank you for sharing your feedback. We understand that a surcharge can be frustrating. The surcharge is disclosed at checkout. We appreciate you bringing your concerns to our attention and would be happy to discuss your transaction directly. Please get in touch with us at [phone number or email] so we can assist you further.

Template for an Inaccurate Complaint

Thank you for your feedback. We take payment charge concerns seriously. We reviewed the transaction and found that the card surcharge described in this review does not match the charge recorded for this purchase. We’d be happy to review the details with you directly. Please get in touch with us at [contact information] so we can look into it further.

Look for Patterns in Your Reviews

One negative review doesn’t mean that your surcharge policy is creating a larger problem. However, you should address similar, frequent complaints.

Visit your business’s review section and see what customers think. Are customers repeatedly saying they didn’t know about the surcharge? Are they complaining about where the information is displayed? Are they confused about the amount? If several people give the same feedback, then it’s important to look into the issue.

For example, if five customers say they didn’t expect your card fee, you can write a polite Google response to protect your reputation in the short term, but it won’t address the underlying problem.

The better solution may be to improve your signage, update your checkout process, or train employees to explain the fee before payment.

Final Thoughts

You might see a less than flattering post about your business on Google. Don’t panic! Taking a defensive or offended tone in your response will only encourage others to post similarly critical reviews. Step one is taking some deep breaths and keeping a calm tone in your response. Then, again, without admitting wrongdoing, acknowledge your customer’s concerns, give a brief synopsis of your card fee policy, and tell the customer you would be happy to discuss the charge in question to answer any questions.

That said, if similar or the same concerns are consistently raised by customers, you may want to consider looking into your company policy. Your policy may be good for your bottom line, but at the expense of customer goodwill.

Holiday Return Policy

What a Good Holiday Return Policy Looks Like

The holiday shopping season brings a common problem for retailers: the normal return policy may not work for holiday purchases. A customer bought a gift in early November, but a recipient might not open it until December 25. If the return window is 30 days, the return period could expire before Christmas. That can frustrate customers and create difficult conversations for your store team.

That is why a well-designed holiday return policy plays a crucial role in solving these issues. It offers shoppers sufficient time to exchange or return unwanted gifts while giving e-commerce businesses clear rules for processing gift returns, refunds, and store credit.

The key is to set these rules before the holiday rush arrives. Write, review, and publish your return policy in early fall, before Q4 sales increase. If you wait until December, employees have to make on-the-spot decisions, which can lead to more customer complaints and inconsistent treatment. Here is what a practical holiday return policy should cover.

What Is the Impact of Holiday Returns on Your Business?

Returns are a normal part of the holiday shopping season. According to research by Cart.com, almost 15% of holiday purchases are returned every year because of unmet customer expectations or gift exchanges. While addressing returns may seem like a shipping and financial burden, a seamless returns process can drive higher long-term profits by building customer trust. Unlike other times of the year, holiday shoppers expect more flexibility when returning an item.

Why You Need a Holiday Return Policy

Why You Need a Holiday Return Policy

A standard return policy usually assumes that the person who buys the product is also the person who will use it, but holiday shopping is different. A customer may buy a sweater, electronic device, toy, or home products weeks before Christmas Eve. The person receiving the gift may not have the original receipt or not know where it was bought. This can make the holiday return more difficult for retailers.  For example, a customer buys a gift on November 6 and your return policy window ends within 30 days.

The recipient opens the gift on December 25 and finds the size is wrong and the color is not right. By then, the regular return policy window has closed. An extended holiday return policy gives gift recipients more time to exchange or return their gifts after the holidays.

Decide How Long the Holiday Return Window Should Be

During the rest of the year, you can offer 14-, 30-, 60- or 90-day returns. But for the holiday shopping season, consider extending the return window so your customers can review and return their gifts easily. Think about your customers’ shopping behavior while selecting dates for returns.

Make a baseline after reviewing your previous holiday sales data if you have it. Check when holiday orders typically pick up and when returns peak. That can help you choose an extension that fits your business instead of copying another retailer’s dates.

Consider Extending Returns through Mid-January

A common option is to give customers until January to return their purchases. This gives customers enough time to open their gifts and decide whether to keep them, return them, or exchange them if needed. Be transparent with your policy terms by avoiding vague statements, for example, “extended holiday returns available.” Your customers should be able to understand how your return policy works; include this checklist:

  • Which purchases are eligible
  • When the extended return period starts
  • When it ends
  • What condition the product must be in
  • Which products are excluded

Explain How Gift Receipts Work

Explain How Gift Receipts Work

A gift receipt is another important aspect of a holiday return policy. A gift receipt shows that an item was purchased without disclosing the actual price. This makes it easier for the gift recipient to exchange or return it. Your return policy should clearly explain what happens when a customer presents a gift receipt.

For example, you may offer store credit or an exchange instead of refunding the customer to their original payment method. Your policy should also mention that customers may use either a physical gift receipt or an electronic gift receipt. Clear rules about gift receipt refunds help employees handle returns correctly and prevent confusion at the register.

Be Clear about Where Refunds Go

One of the most important parts of the return policy is explaining where the refund goes. If someone paid with a credit card, the refund usually goes to the original payment method instead of being given as cash to the person returning the gift. This matters because the person returning the product may not be the same person who bought it. Your job is to ensure your policy clearly explains the difference between a regular return and a gift return.

Create a Rule for Gifts without a Receipt

Not every gift recipient will have a receipt, but that doesn’t mean you have to reject every return. Many retailers also offer store credit for gift returns. This policy is established to support customers who don’t have the original receipt. If you offer this option, make the rules clear. For example, the item may need to be unused or meet your return condition requirements. It must also be an eligible product, and the customer may need to provide another way to help identify the purchase.

Decide Whether Store Credit Makes Sense

The store credit option can help with gift returns because the person returning the order may not have access to the original payment method. This policy lets the gift recipient choose something they actually want based on their likes and dislikes. Customers should clearly know when they will receive a refund and when they will receive store credit. Your store credit policy should also be clear between these situations:

  • Purchaser: Eligible for a refund to the original payment method.
  • Gift recipient with gift receipt: A person with a gift receipt who wants to exchange or return the product can also receive store credit.
  • Gift recipient without receipt: A person without a gift receipt can exchange the item if it meets the retailer’s requirements.

Identify Final-Sale Items Before Customers Buy

The holidays bring an onslaught of final-sale purchases. Something should be on product listings to indicate final sale, if that’s the case. It’s better to inform customers at the time of purchase about which products can’t be returned. Some products that usually have restrictions on returns include: clearance items, customized items, hygiene products, digital products, and personalized items. To indicate final sale or to state the return and exchange policy, the notice should be near the product listing or in the customer’s cart.

Make the Return Policy Easy to Find

Make the Return Policy Easy to Find

If you run the business from a physical space, post it in an obvious place. If you’re doing business over the phone, state it clearly to the customer. If you’re running it online, make sure it’s easy to find. Don’t lose business simply because your return policy isn’t obvious or easily found by the customer.

Post it in multiple places before holiday traffic begins.

Consider including it on:

  • Your website’s return policy page
  • Checkout
  • Receipts
  • Shipping confirmation emails
  • Product pages where required
  • Gift-purchase communications
  • Customer service scripts

Write the Policy in Early Fall

While many stores wait until the holiday shopping season is in full swing to implement their return policies, you should post your policy well in advance. You’ll want to give yourself plenty of time to account for policy changes and to make any updates to your staff or your store. From an operational standpoint, you should decide on your policy, train your employees, and alter your systems well in advance to avoid issues during the holiday rush.

One situation that happens often during the holidays is that employees will make their own rules on a case-by-case basis, especially when dealing with returns. Sometimes employees will decide to accept a return after the return policy window, while others will refuse it. If you have policies and procedures in place and educate your employees on those policies, employees will be less likely to make their own rules when dealing with customers.

Review Your Policy for Legal Requirements

Return and refund policies are often impacted by local laws protecting consumers and specific product rules. Also, there may be rules requiring the disclosure of restrictions on refunds. Make sure you understand the rules for each location where you do business. This is especially important when you sell products on multiple websites or when you sell products across international borders. If your business has an attorney, you may want to have your return and refund policies reviewed by your attorney before each holiday selling season.

Conclusion

Help customers return purchases by extending a “reasonable” time frame. Anticipate and provide answers for customers about returning gifts. Tell customers about your policies for refunds, exchange limits, and final sales before they make a purchase. The most important thing to know about holiday policies is to make them before the holiday season.

If you don’t have time to plan your policies for the holidays, you can consult The Holiday Season Plan. This resource may also be useful to your employees because it gives information about policies for refunds and exchanges. Again, clear policies instill confidence in customers and give them the peace of mind to do their holiday shopping at your business.